
Thursday, May 22, 2014

Thursday, April 3, 2014
No Bake Salted Caramel Hazelnut Cookies {A New Addiction}

Chocolate Peanut Butter No Bake Cookies are
on the top of my favorite cookie list.

No bake cookies can be tricky to make and several people have a hard time making them.
The key to making successful no bake cookies, is to boil the mixture for the perfect amount of time. Boiling the mixture too long and the cookies can become hard and crumbly. Not boiling them long enough and the cookies won't set up. I have found that boiling the sugar mixture for exactly 1 1/2 minutes usually does the trick.

Weather
can also play a role in your cookies setting up. Make sure it's a dry
day and not a humid one, because these cookies don't take a liking to
humidity. Chocolate no bake cookies are a lot like making candy and are
very sensitive to humidity.

In
a medium sized sauce pan over medium high heat add butter, sugar, cocoa
powder or chocolate squares, milk and salt. Stir until butter is
melted and ingredients are incorporated. Bring to a full rolling boil, and boil for 1 1/2 minutes, stirring constantly (I use a wire whisk).
Remove from heat and using a wooden spoon stir in chocolate salted caramel hazelnut spread, vanilla and oatmeal, mix well. Working quickly before the mixture cools scoop by tablespoons onto wax paper or foil. Let cool completely then remove once the cookies have set up.
Remove from heat and using a wooden spoon stir in chocolate salted caramel hazelnut spread, vanilla and oatmeal, mix well. Working quickly before the mixture cools scoop by tablespoons onto wax paper or foil. Let cool completely then remove once the cookies have set up.

No Bake Salted Caramel Hazelnut Cookies
courtesey of {mommyskitchen.net}
2 - cups granulated sugar
2 - tablespoons unsweetened cocoa powder
1/2 - cup butter
1/2 - cup whole milk
1/8 - teaspoon salt
1/2 - cup Jif Salted Caramel Hazelnut Spread
2 - cups old fashioned oats
1 - teaspoon vanilla extract
Stir until butter is melted and ingredients are incorporated. Bring to a full rolling boil, and boil for 1 1/2 minutes, stirring constantly (I used a wire whisk).
Remove from heat and using a wooden spoon stir in chocolate hazelnut spread, vanilla and oatmeal, mix well. Working quickly before the mixture cools scoop by tablespoons onto wax paper or foil.
Remove from heat and using a wooden spoon stir in chocolate hazelnut spread, vanilla and oatmeal, mix well. Working quickly before the mixture cools scoop by tablespoons onto wax paper or foil.
Let cool completely then remove once the cookies have set up.
Recipe yields: about 24 cookies
Cook's Note: The cookies get their shiny gloss from not touching or disturbing the cookies once you have dropped them on wax or foil. Also 2 - (1 oz) squares unsweetened Bakers chocolate can be substituted for unsweetened cocoa powder. Recipe yields: about 24 cookies
Hidden Chicken and Cream Cheese Recipe

Ingredients
- 4 large potatoes
- 1 cup milk
- 3 tablespoons butter
- 1 shredded chicken breast
- 1 box of cream
- 1 small tube of cream cheese
- 1 can corn
- 8 slices of mozzarella
How to prepare
- Chop the potatoes into large cubes.
- Cover it with water and cook in a normal pot
- Once it is cooked, mash it, blending in the butter, milk and salt to taste.
- Cook the chicken breast, shred and season on its way
- Mix in sour cream and corn
- In a separate dish place a layer of potatoes, layer it with cream cheese, place the chicken on top and cover with the rest of the potato.
- Finally top with mozzarella and place it in the oven to glaze.
-

-
 Time to prepare 1h 00min
- 6 portions
-
Wednesday, April 2, 2014
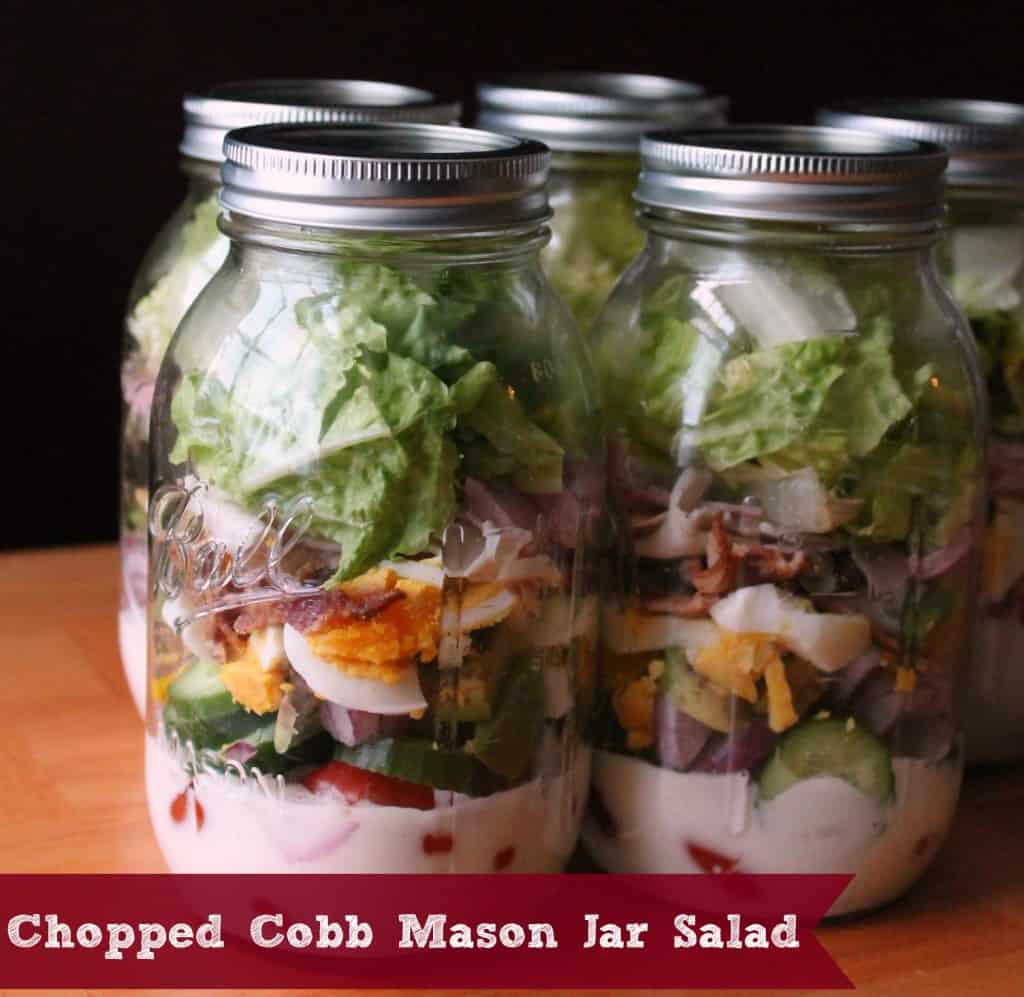
Chopped Cobb Mason Jar Salad
Prep time
Total time
Author: Organize Yourself Skinny
Serves: 5
Ingredients
- 5 wide mouth quart size mason jars
- 10 tablespoons yogurt blue cheese dressing
- 1 quart cherry tomatoes, halved
- 5 mini cucumbers, sliced
- 1 small to medium red onion, chopped
- 5 hard-boiled eggs, chopped or sliced
- 2 avocados, chopped
- 5 slices cooked crispy bacon, crumbled
- 5 slices, thinly sliced turkey, cut into pieces
- 5 slices, thinly sliced ham, cut into pieces
- 5 cups chopped romaine lettuce
Instructions
- Divide ingredients among mason jars. Start with dressing then add tomatoes, cucumbers, onion, egg, avocado, bacon, turkey, ham, and ending with romaine. When ready to eat, shake, then pour into a bowl.
Notes
Make Ahead Instructions
These salads can be made up to 5-6 days ahead of time.
These salads can be made up to 5-6 days ahead of time.
Nutrition Information
Serving size: 1 mason jar Calories: 400 Fat: 20 Carbohydrates: 29 Fiber: 8 Protein: 27
Salad in a (Mason) Jar
Layer 1: The Dressing
The first layer of the mason jar salad is always the dressing. You can use any type of dressing you like. As I said I prefer a vinaigrette dressing but I do like a creamy ranch and blue cheese too. It completely depends on your preference. Also, like I said before the vinaigrette dressing will come out of the mason jar easier. If you use a thicker dressing you will have to give it a good shake and probably use your fork to scrape it out. I use between 2-3 tablespoons of dressing. Currently I use bottle dressings but you can certainly use homemade dressing if you want.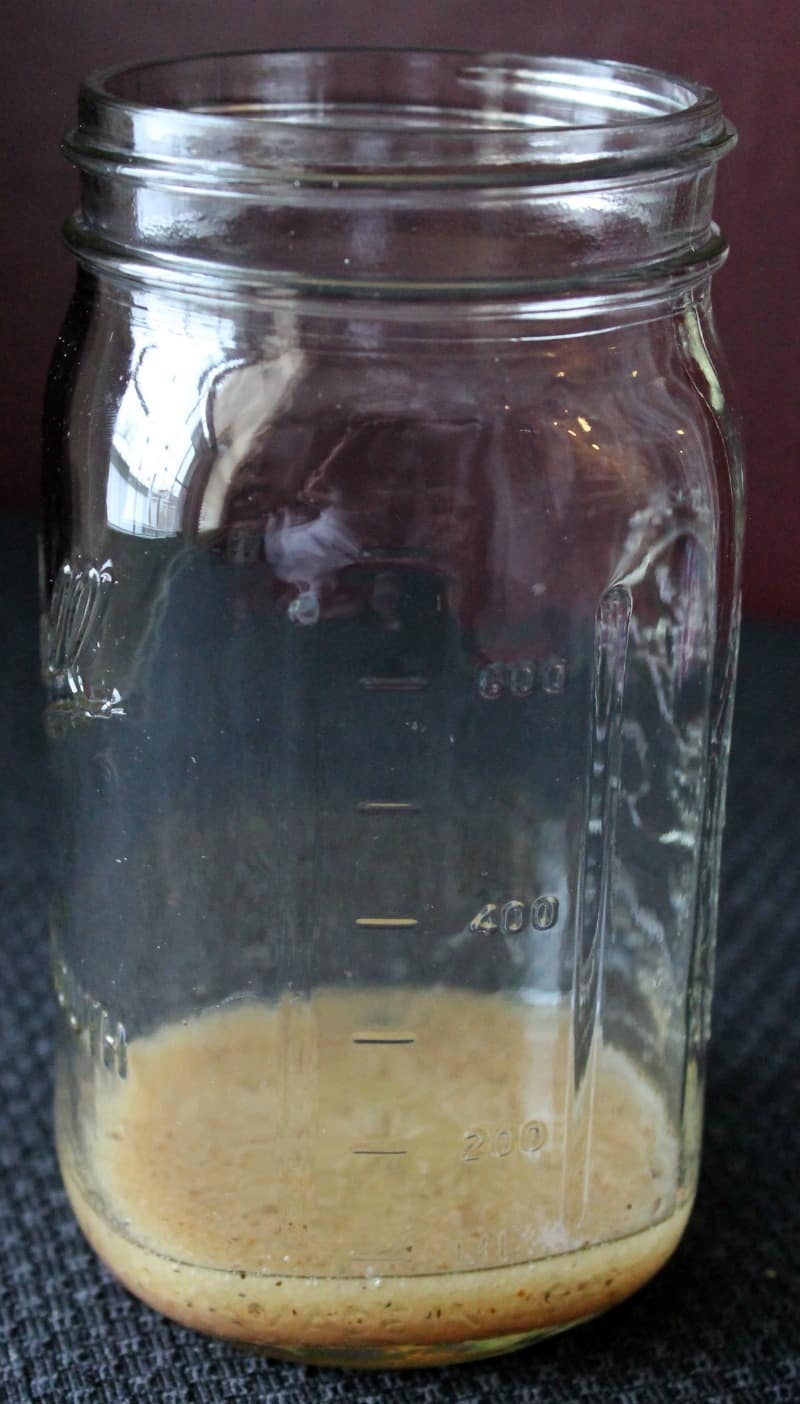
Layer 2: Hearty Vegetables
This layer is very important because it is used to shield the dressing from the lettuce and other vulnerable ingredients. In this layer you would use vegetables that can hold up to being in dressing for a week or so. Like I said think vegetables that would do well in a marinade or pickled. Vegetables I have used are tomatoes, cucumbers, red onion, broccoli, cauliflower, asparagus, celery, carrots, peppers, and any other hearty vegetable you like.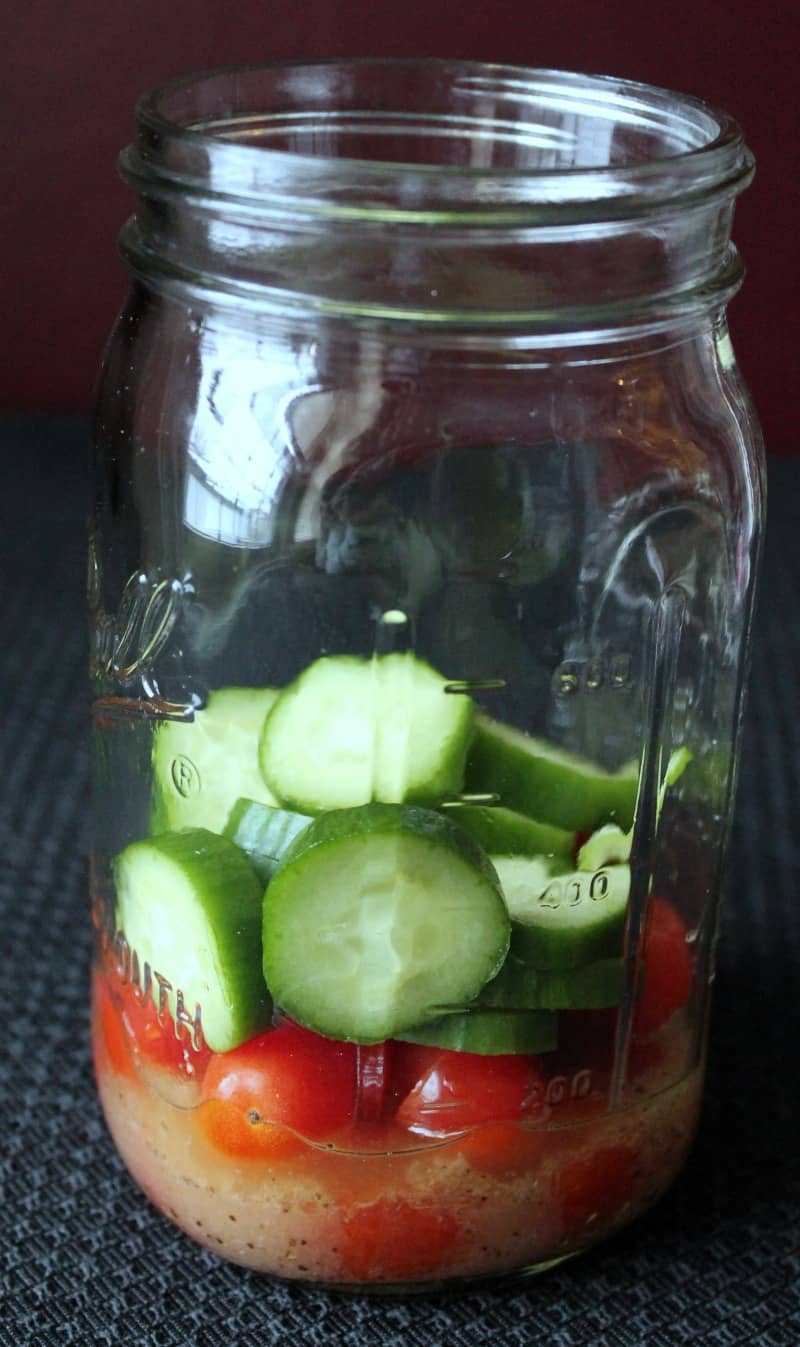
Layer 3: Beans and Other Less Hearty Vegetables
This layer is where you will put beans and other less hearty vegetables like mushrooms, zucchini, sprouts, green beans, corn etc if you choose to use them. If you are using an avocado then that would be in this layer too. Basically, this layer acts as a second defense between the dressing and lettuce. You don’t want this layer marinating in the dressing but it will be fine should some of the ingredients get exposed.Layer 4: Pasta and Grain Layer
This layer is where you add your pasta and/or other grain if using. At this point the other 1-2 layers should keep the dressing away from this layer. However, if by some chance dressing does make its way to this layer no worries everything should be fine. For pasta and grains you can use any type of pasta, rice, couscous, and/or quinoa. Really anything would work so get creative.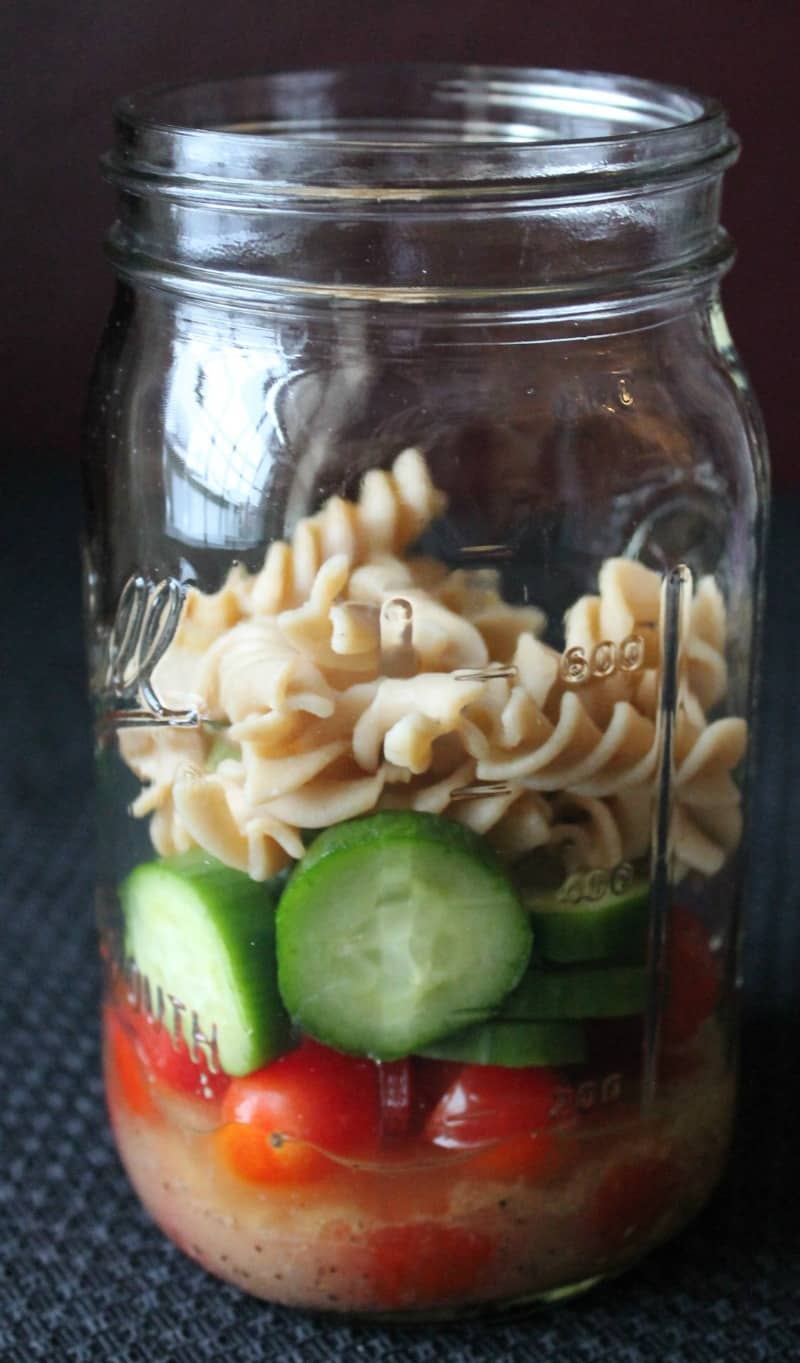
Layer 5: Protein and Cheese
In this layer I put meat, eggs, and cheese. I like to keep these ingredients away from the dressing because I do not feel they do well if sitting in dressing for a couple days or more. If you are using shrimp or other seafood I would add those ingredients to this layer. For cheese, I have used blue cheese crumbles, feta cheese, goat cheese, shredded cheese, and cubed cheese in my mason jar salad. Each of them has worked fine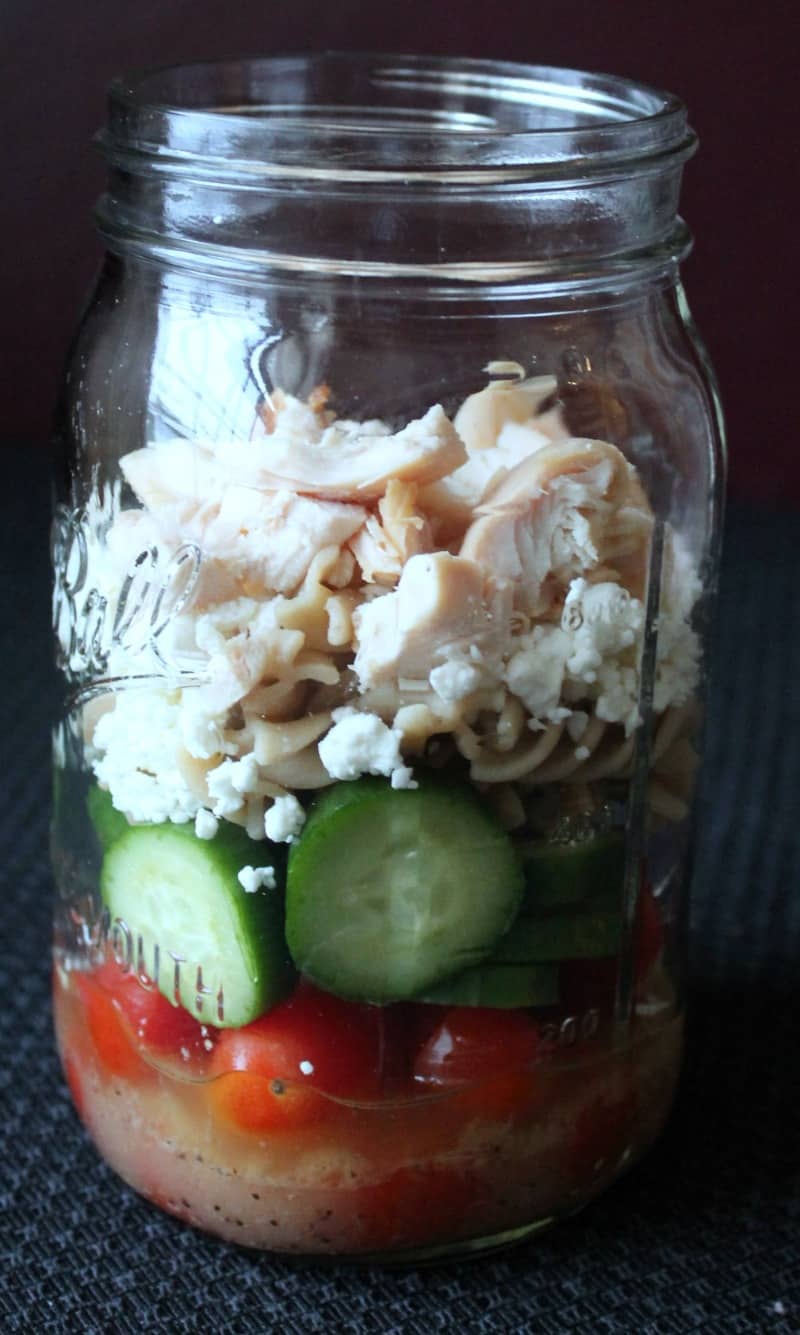
Layer 6: Lettuce, nuts, and seeds.
In this last layer you want to put ingredients that would wilt or become to soft and soggy if exposed to dressing to soon. This definitely includes any type of lettuce or green. I also included nuts in this layer because I have found that the nuts at times lose their crunch if to close to the first layer. My favorite green to use are arugula, baby spinach, and field greens. But of course you can use whatever you prefer.
Also, there is really no rule with the amount of ingredients to put in each layer or that you must include all layers. The most important layer is the layer 2 with the hearty veggies. You just want to make sure to have enough ingredients to keep the dressing and lettuce away from each other. If you are concerned with calories or the nutritional information in the mason jar salads you can always calculate that information ahead of time using My Fitness Pal.
Tuesday, April 1, 2014

Thursday, March 27, 2014
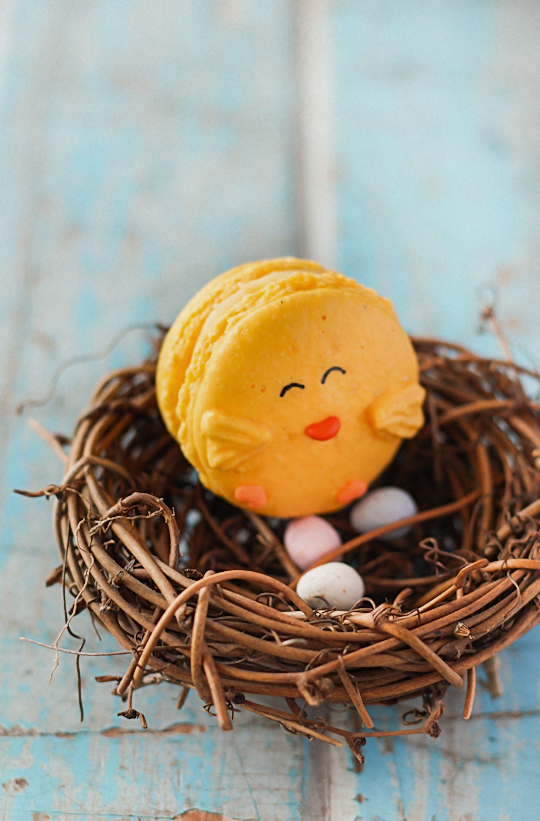
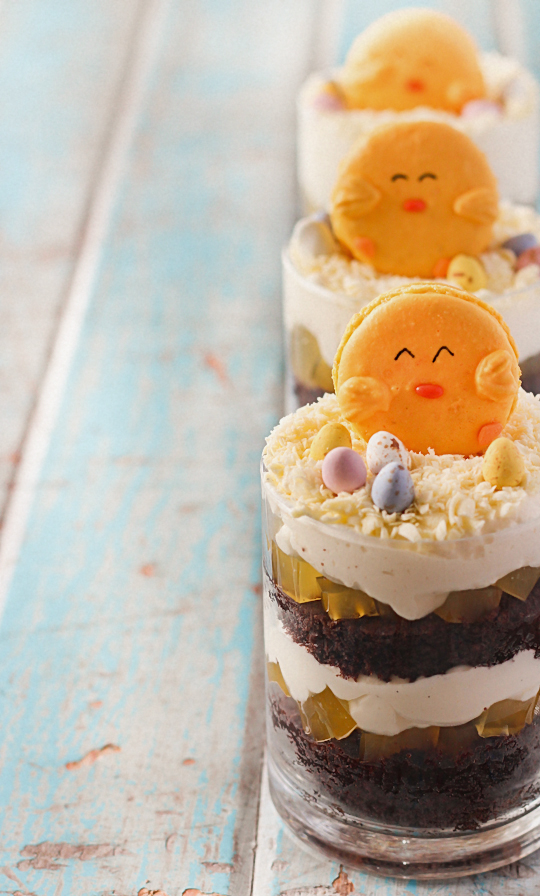
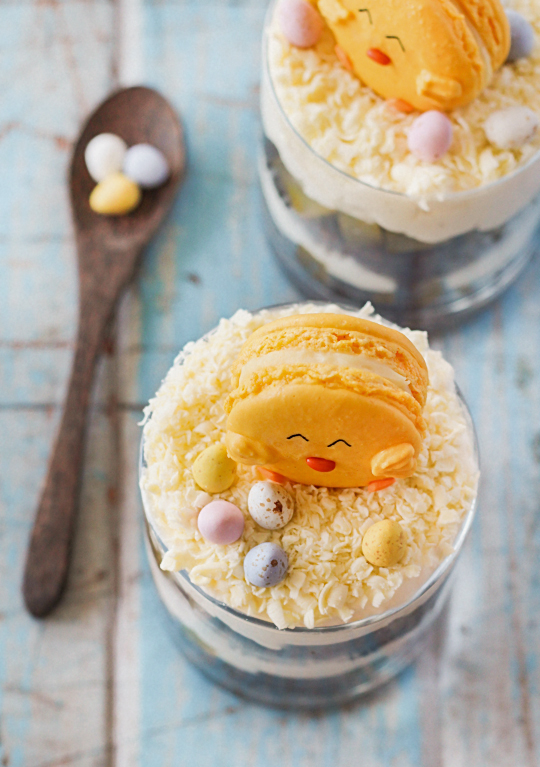
Easter Trifles (with Chick Macarons)
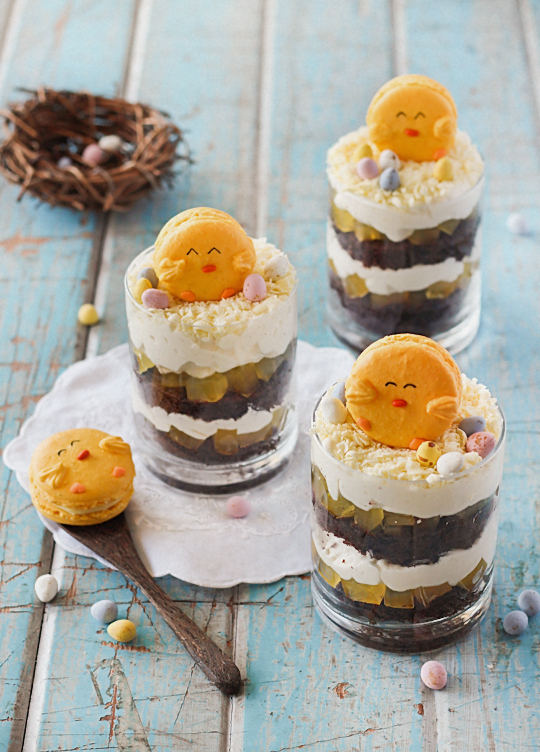

Aren't they adorbs?! They are individual serve chocolate
& orange trifles topped with a white chocolate nest, speckled eggs
and orange white chocolate chick macarons. A bit of a mouthful and certainly much more complicated than last years super popular Cheesecake-Filled Chocolate Easter Eggs, but so worth the effort.
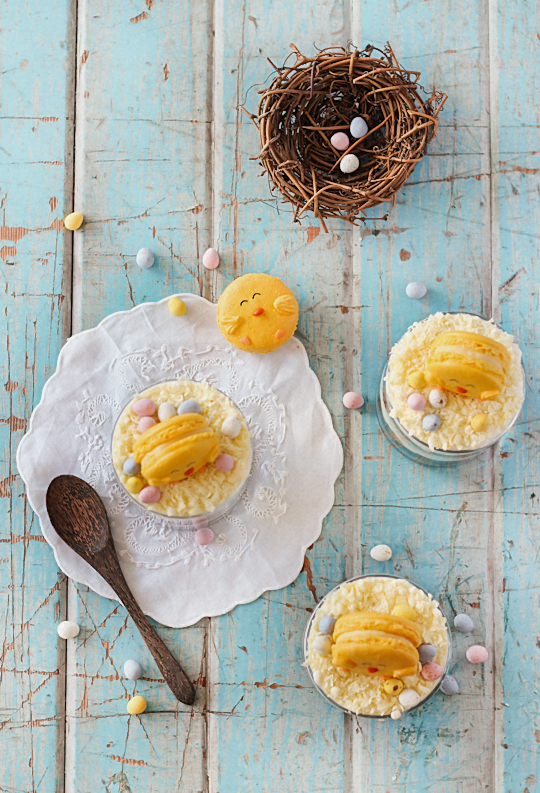
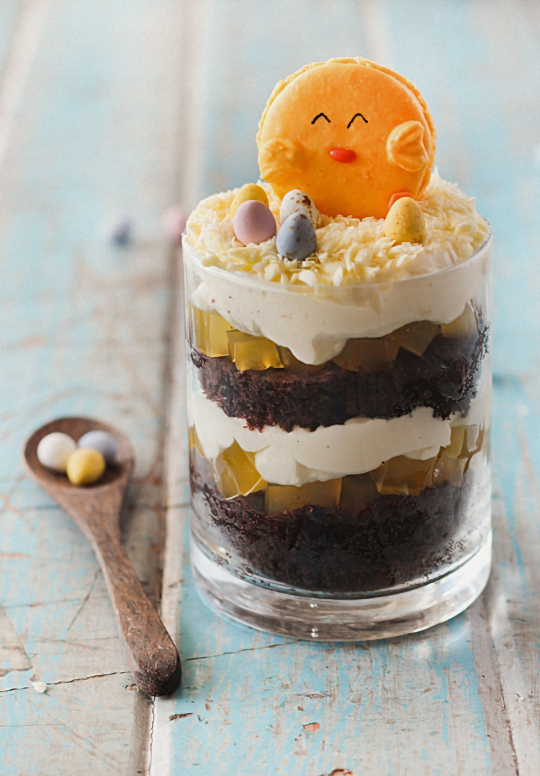



Chocolate & Orange Trifles with Chick Macarons
(serves approx 6-8 people, makes about 15 macarons)
For the macarons: (if you are a beginner with macarons, read up and practice plain macarons first. BraveTart has lots of useful advice and info on the subject)
100g aged egg whites (you can use fresh eggs too, just make sure they
are room temperature. I always use fresh these days, and zap it in the
microwave on defrost for 10 seconds)
1/2 tsp salt
110g almond meal, at room temperature and well sifted
200g icing sugar
50g caster sugar
110g almond meal, at room temperature and well sifted
200g icing sugar
50g caster sugar
Yellow food colouring (powdered or gel)
Optional: 1 tsp powdered egg whites (available from The Essential Ingredient), helps to stabilise egg whites but is not necessary
Optional: 1 tsp powdered egg whites (available from The Essential Ingredient), helps to stabilise egg whites but is not necessary
To decorate: Orange heart sprinkles/orange candy coated fennel seeds, black food colouring,
Line two baking sheets with baking paper.
Place icing sugar in food processor and pulse for a minute to
remove any lumps. Stir in almond meal and pulse for about 30
seconds to combine. Sift into a large mixing bowl and set aside.
Using an electric mixer, beat egg whitesm salt and egg white powder in a
medium mixing bowl until the egg white powder dissolves and it
reaches soft peaks. With the mixer on high speed, gradually add
sugar and beat until it reaches stiff peaks. (You can add the food colouring to the meringue as you are beating it to
stiff peaks, it makes it easier to adjust how much colouring to add.
Otherwise add it in the next step.)
Add meringue to your dry mixture and mix, quickly at first to break
down the bubbles in the egg white (you really want to beat all the
large bubbles out of the mixture, be rough!), then mix carefully as
the dry mixture becomes incorporated and it starts to become shiny
again. Take care not to overmix, the mixture should flow like lava
and a streak of mixture spread over the surface of the rest of the
mixture should disappear after about 30 seconds. Place mixture in a
piping bag with a 1cm round piping tip. Pipe rounds about 3cm
diameter, leaving at least 2cm space around each one. Tap baking sheets
carefully and firmly on the
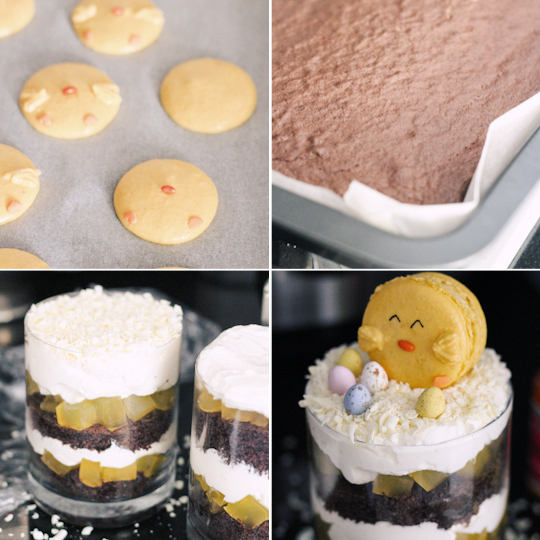
benchtop a couple times to remove any large bubbles. I carefully topped
half the macarons with two heart-shaped orange sprinkles for the feet
and a candy coated fennel seed for the beak, then piped the wings on
using a narrow star tip. (This does make the shells more susceptible to
cracking, as an alternative you can bake the shells plain and pipe on
decorations later with royal icing.)
Leave to dry for about an hour, so that when you press the surface
of one gently it does not break. This will help prevent any cracking
and help the feet to form on the macs. Preheat your oven to
130-150°C (265-300°F), depending on
your oven. You can place the sheet of piped shells on top of an
upside-down roasting tray or another
baking sheet if your sheets are not professional grade, for better
heat distribution. Bake for 20-25 minutes, depending on the size of
your shells. Carefully test if the base of the shell is ready by
gently lifting one and if it's still soft and sticking to the baking
paper, then it needs to bake for a few minutes longer. Remove from
the oven and cool on the tray for a few minutes, then gently remove
from the sheet and place on a wire rack to cool completely. I used
a wooden skewer dipped in black food colouring to draw on the eyes.
For the orange ganache:
200g (7oz) white chocolate, finely chopped
100ml (just over 1/3 cup) thickened (heavy) cream
Zest of one orange + 1 tbsp orange juice
Place white chocolate and orange juice in a medium mixing bowl. Heat
cream and orange zest in a small saucepan over low heat until it just
comes to the boil, stirring regularly. If you want a smoother ganache,
strain the zest out at this point. Pour hot cream over white chocolate
and leave to sit for about 3-5 minutes, then gently whisk until the
chocolate melts and the mixture is smooth. (If it does not completely
melt, place bowl over a small pot of boiling water and whisk until
smooth.) Chill until mixture thickens but is still pipable, then
sandwich in between macaron shells.
For the orange jelly (feel free to replace with packet orange jelly or segmented fresh orange slices):
1/2 cup water
Peeled rind and juice from 3-4 oranges
1-2 tbsp sugar, adjust to taste
2 tbsp powdered gelatine + 1/2 cup water
Optional: 1 tbsp Grand Marnier
Grease a 20cm square cake tin with vegetable oil or line with baking
paper. Place powdered gelatine in 1/2 cup water and set aside to soften.
Heat 1/2 cup water plus the peeled rind and juice in a small saucepan
and simmer for about 5 minutes. Strain out the rind and add sugar to
taste. Gently whisk in softened gelatine and Grand Marnier and pour into
prepared tin. Chill for at least 3-4 hours until set or overnight.
For the chocolate sponge:
Use this recipe from Gourmet Traveller, which I always use for my Tim Tam Cake. You can also use store-bought sponge.

To assemble:
475ml (about 2 cups) thickened cream
1 tsp vanilla bean paste (or scraped seeds of 1 vanilla bean pod)
White chocolate (about 100g), grated
Optional: 1 tbsp Grand Marnier plus extra for brushing sponge, easter eggs to decorate
Chop orange jelly into 1 cm cubes. Whip cream with vanilla beans to soft
peaks and then fold in Grand Marnier. Cut rounds of chocolate sponge
about 2 cm thick to fit into about 6 serving glasses (I found my sponge
baked quite high so I could actually cut each round into two layers).
Place one layer of sponge, brush with Grand Marnier, top with a layer of
jelly cubes followed by a layer of cream. Repeat. Top with a layer of
grated white chocolate, a chick macaron and easter eggs to decorate.
Chill in the fridge for an hour and then serve. If you are not serving
immediately do not assemble and do not whip the cream. Keep other
components in fridge and then whip cream and assemble when ready to
serve.
Subscribe to:
Posts (Atom)